How to Make
Lavender Wands and Bottles
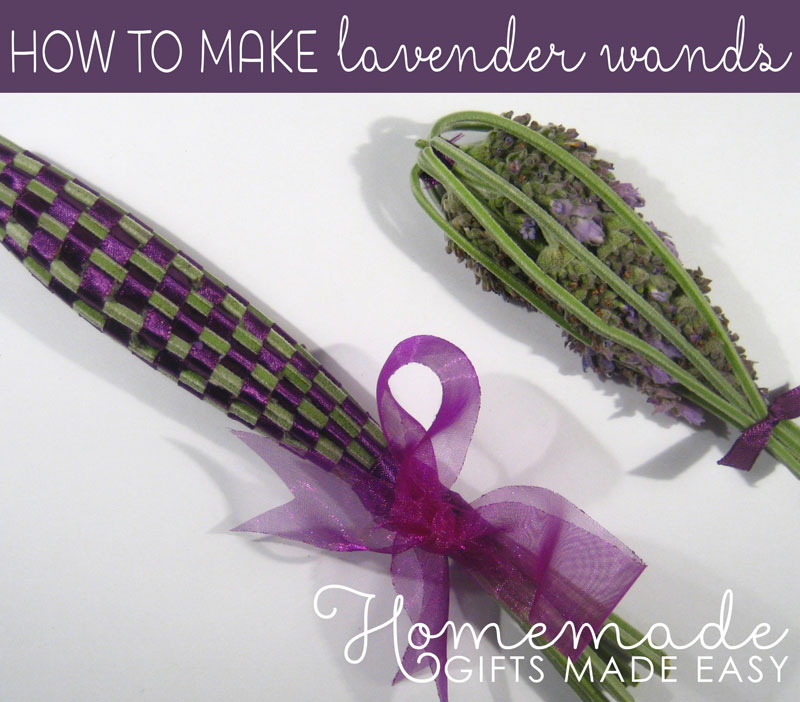
Once you've learnt how to make lavender wands and bottles, you'll wonder why you never made them before!
These fragrant little bundles look gorgeous, smell wonderful, and make cute gifts :-) Lavender is a natural moth repellent , so lavender-wands are traditionally placed in closets or drawers, where they keep clothes moth-free and fresh-smelling.
Lavender is used in aromatherapy for its relaxing qualities . A wand combined with some homemade lavender bath salts or bath bombs makes a great "relaxation pamper kit". Also, lavender is reported to help people sleep - a wand placed under your pillow will send you off to sweet dreams. You can even use a lavender wands as an air freshener in your car - don't fall asleep though!
Once you weave a lavender wand, it keeps its scent for months . If the scent begins to fade, you can squeeze the wand it to release more fragrance.
Did you know?
In ancient Rome, lavender was used to scent bath water. The very name 'lavender' comes from the Latin lavandus , meaning 'to wash'.Okay, on to the details of how to make lavender wands and bottles. First up, you'll need to gather your lavender. But if you like, you can skip ahead to the instructions for lavender bottles (easy!) or lavender wands (slightly trickier, but still pretty easy).
Gathering the lavender
The first step in learning how to make lavender wands is gathering the lavender.
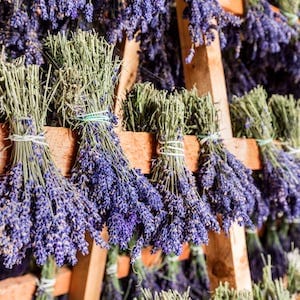
Collect 7-15 fresh lavender stems, with at least 8" (20cm) of stem below the flower. Ideally, you want young flowers that are still in the bud. If the flowers are in full bloom, then they tend to fall off the stem as they dry. Not a big deal, but your lavender wand might shed a few lavender crumbs in your closet.
Use a long-stemmed variety of lavender if you can find it, but you can also use regular lavender - just remove the leaves from the stem. As with most herbs, the best time to pick is in the mid-morning after the dew has evaporated.
Don't have any lavender in your garden? Maybe there's some growing in your neighbourhood, or in the garden of someone you know? They might be happy to exchange some fresh cuts of lavender for a wand in return :-)
Now onto the instructions for how to make lavender wands and bottles.
How to Make Lavender Bottles
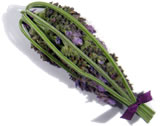
Materials
- 7-15 lavender buds/flowers, with long stems.
- A short length of 1/4" (0.5cm) ribbon
- Scissors
- A spoon... you'll see why in a moment
Method
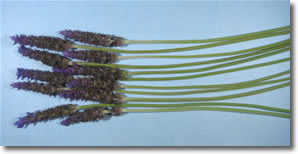
Step 1: Lay the lavender stems side by side, with the flowers staggered in two rows. Staggering the flowers like this makes a long slender bottle, whereas lining all the flowers up on the same level makes a short fat bottle.
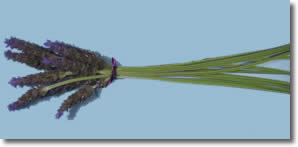
Step 2: Tie some ribbon tightly around the stems at the base of the flowers, and snip the loose ends of ribbon close to the knot.
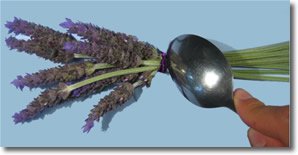
Step 3: Use the edge of a spoon to squash the stems just near the knot. This makes the stems easier to bend without snapping in the next step.
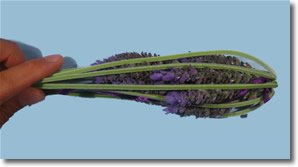
Step 4: Bend the stems to form a cage around the buds. Try to space the bars of the cage evenly.
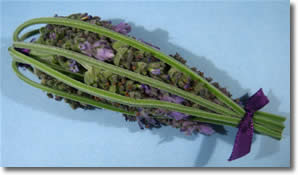
Step 5: Finish off by tying ribbon around the stems at the base of the cage. Trim the excess stems.
Tip: Don't place the lavender bottle directly against fabrics for the first few weeks after you make it, because green pigment can bleed from the stems before they dry out.
Now that you have made these easy lavender bottles, why not learn how to make lavender wands?
How to Make Lavender Wands
Materials
- 7-15 lavender buds/flowers, with long stems. You need an odd number of stems for the weaving to work.
- 2 yards of 1/4" (0.5cm) ribbon
- Scissors
- A toothpick
- A spoon... you'll see why in a moment
Method
 Step 1:
Lay the lavender stems side by side, with the flowers staggered in two rows. Staggering the flowers like this makes a long slender wand, whereas lining all the flowers up on the same level makes a short fat, fat, wand.
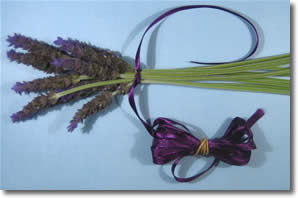
Step 2: Tie ribbon tightly around the stems at the base of the flowers. Leave at least a 10" (25cm) loose end - you'll need it to make a finishing knot later on. Leave the other end of the ribbon attached to the spool. (My "spool" is just a rubber band in this pic.)
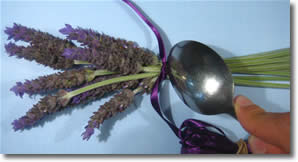
Step 3: Gently squash the stems with the edge of a spoon, just next to the ribbon. This makes them easier to bend without snapping in the next step.
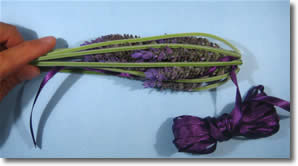
Step 4: Bend the stems to form a "cage" around the flowers. Run the loose end of the ribbon alongside the flowers, to poke out of the bottom of the cage. See it next to my fingers? Let the spool-end of the ribbon poke out between the bars at the top of the cage.
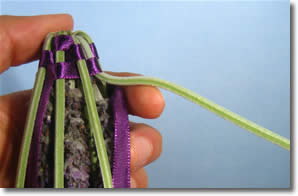
Step 5: Weave the spool-end of the ribbon under and over the lavender stems, like this.
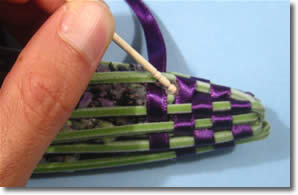
Step 6: If bits of flower stick out between the stems and ribbon, poke them back into place with a toothpick.
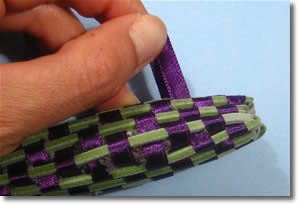
Step 7: Keep weaving until you reach the place where the flowers end. Then go back to the start, and pull the ribbon tight. Take up any slack ribbon and work it all the way through, to make the weaving nice and snug. The lavender will shrink as it dries, so weaving tightly is important.
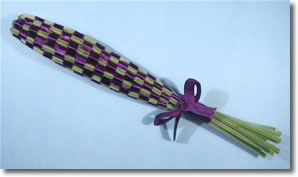
Step 8: Wrap the spool-end of the ribbon around the base a few times, then tie it to the loose-end that you left poking through the bottom of the cage in step 4.
Finished!
Tips:
- Don't place the lavender bottle directly against fabrics for the first few weeks after you make it, because green pigment can bleed from the stems before they dry out.
- If you find the weaving gets loose after a couple of days as the lavendar dries, you might like to tighten it up again. A partially-open paperclip works well to help grab the ribbon - thanks Diane for the tip!
Related pages
I hope you enjoyed learning how to make lavender wands :-) Did you notice that your hands smell really nice afterwards?
Here are some other projects I think you might enjoy...
Or checkout my full list of lavender craft projects.
