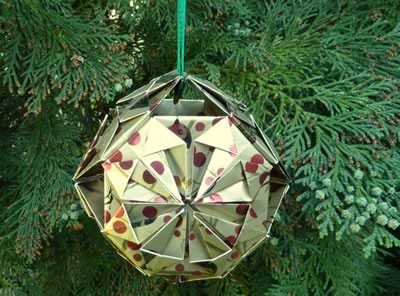
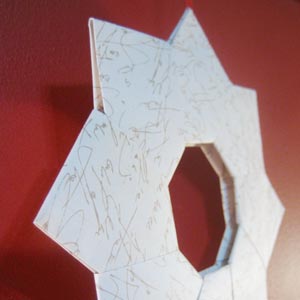
Origami Christmas Ornaments to Make
Looking for origami Christmas ornaments? You've come to the right page!
These paper Christmas ornaments are easy to make and look gorgeous hung on the Christmas tree. They make nice gifts, and making them is a fun craft activity to do with the kids.
Materials to Make Origami Christmas Ornaments
All you need is:
- 6 sheets colored paper, each 6" by 12" (I used wrapping paper cut to size)
- Glue or double-sided adhesive tape
- String or ribbon to hang your decoration
That's it!
How to Make Origami Christmas Ornaments
I promise you that making these ornaments is actually really easy . Don't worry about the number of steps, because each step is reallys simple. And if you get stuck at any point, contact me , and I'll see if I can help :-)
Step 1
Start with a 6" by 12" piece of wrapping paper (or other colorful paper) like the picture below. My paper is a bit crumpled because I'm being green and recycling a piece of used wrapping paper :-)
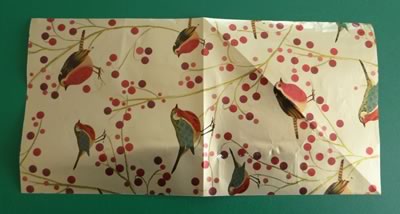
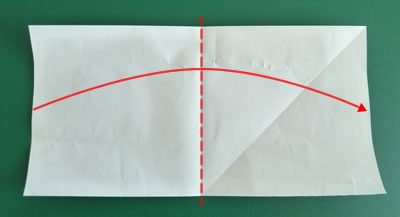
Turn it over so that the nice side is down, then fold in half:
Step 2
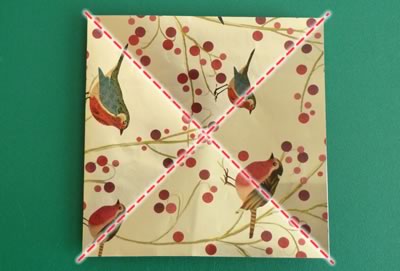
Fold in half and unfold again along each of the two diagonal directions, shown by the dashed lines below:
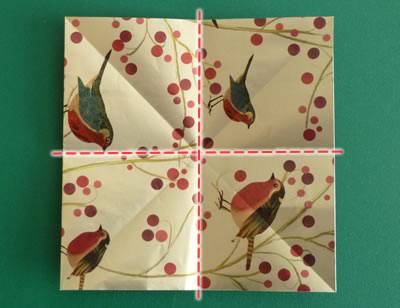
Then fold in half and unfold again along the horizontal and vertical directions, shown by the lines below:
Step 3
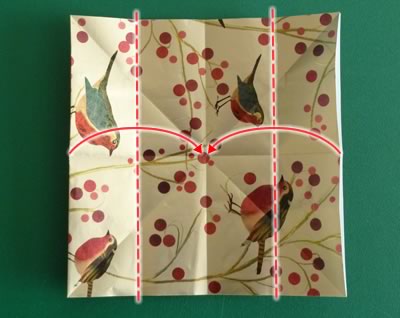
Fold the left and right sides in to meet the center.
Step 4
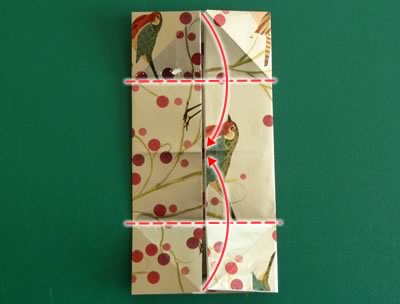
Fold the top and bottom edges in to meet the center
Step 5
Fold up diagonally like this, then unfold:
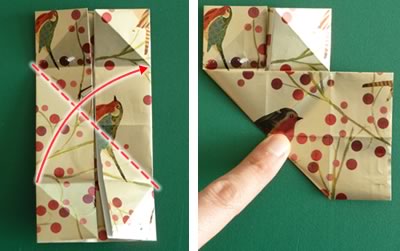
Make the same fold again but in the other direction:
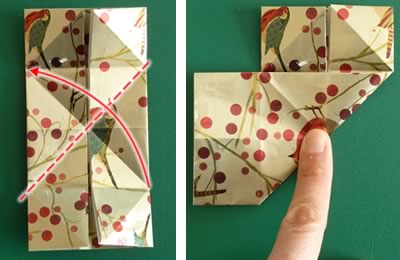
Step 6
Fold up the bottom and open it outward at the same time, as shown by the arrows below:
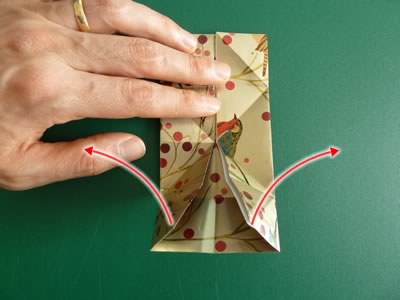
Keep going...
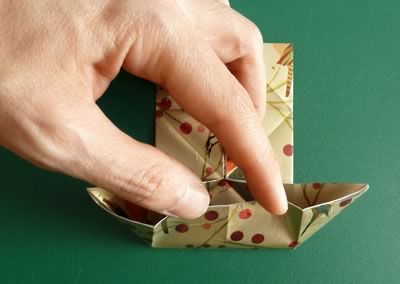
...and then squash it flat like this:
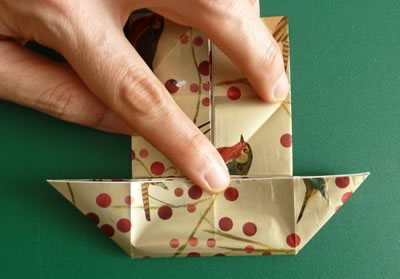
Do the same thing on the top, so that your paper ends up looking like this:
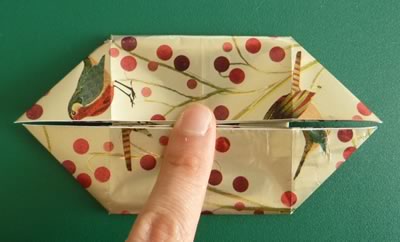
Step 7
Fold up the two top flaps, and fold down the two bottom flaps:
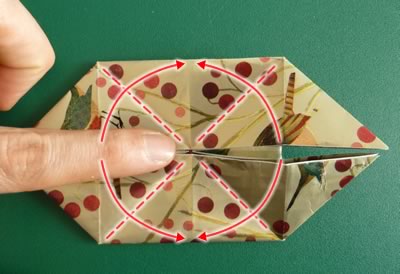
Your paper should then look like this:
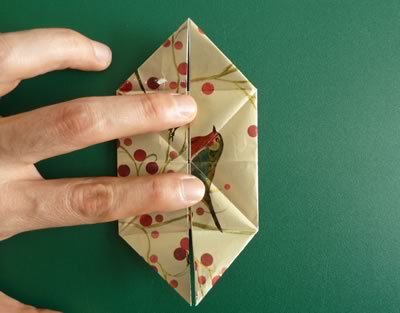
Step 8
Lift up the top-right flap, and open it out...

Keep going...
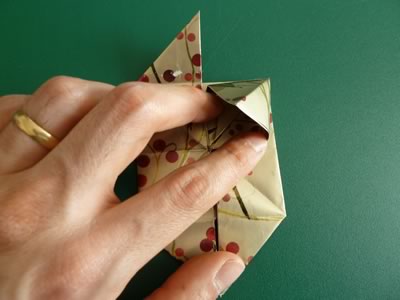
And squash it flat:
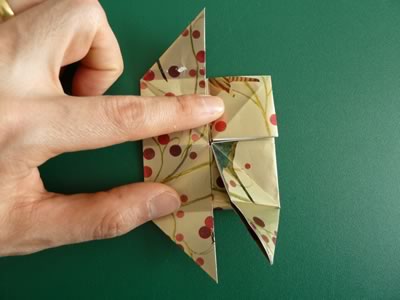
Then do the same thing for the other three flaps, so that your paper looks like this:
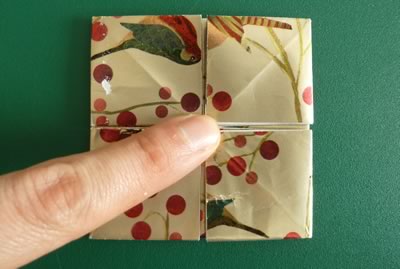
Step 9
Fold in the two sides of the top-right square, like this:
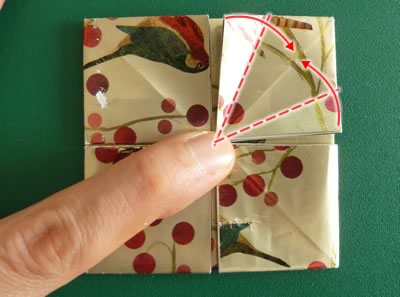
Step 10
Open out one of the folds you just made:
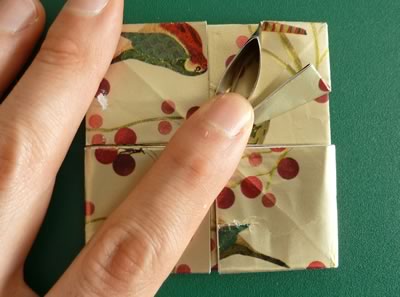
Then squash it flat:
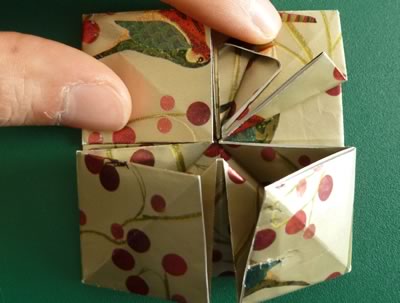
Repeat with the other flap, and your paper should look like this:
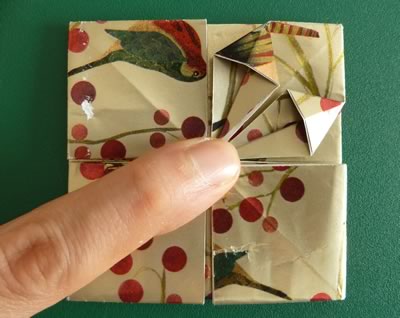
Step 11
Repeat steps 9 and 10 all the way around the paper. Then fold back the 4 corners along the lines shown below:
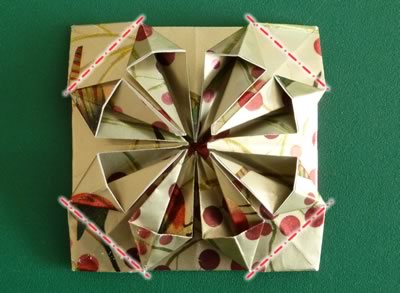
This is what the paper should look like from the other side:
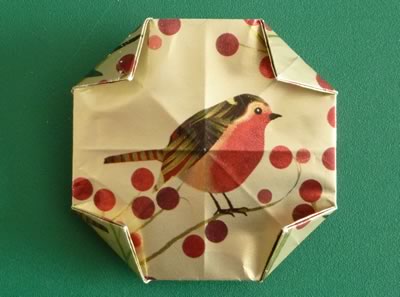
Step 12
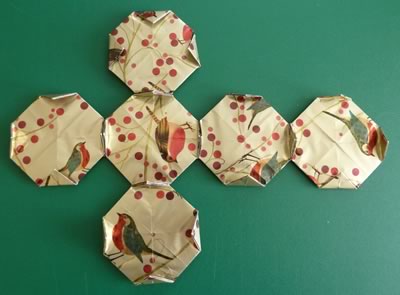
Make 5 more pieces the same way, until you have 6 pieces all together. Arrange them like this on the table, and glue together at the little folded up corners:
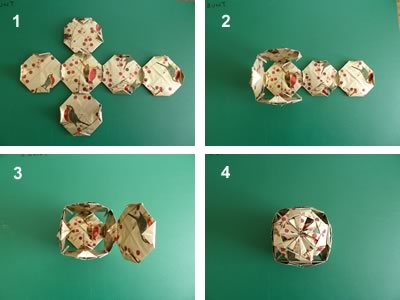
Then glue together the rest of the edges in this sequence to finish your decoration:
Finished!
Once you've glued all the pieces together, here's what the finished decoration looks like:

How did your origami Christmas ornament turn out? I hope you found my instructions clear. If you have any questions or comments, or just want to say hi, please contact me with this handy form :-)
More Christmas Ornaments to Make...
Now that you've folded an origami Christmas ornament, try making some of these other homemade Christmas decorations...
Or see my complete collection of homemade Christmas ornament tutorials.
