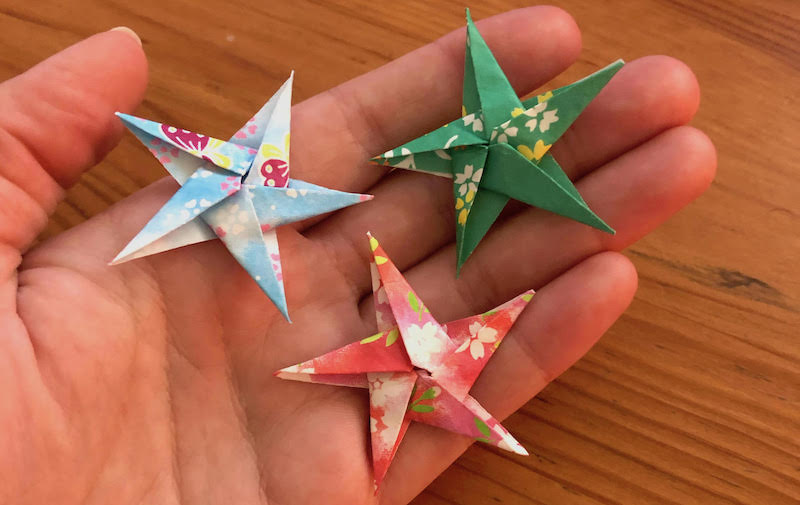
5 Pointed Origami Star
Christmas Decorations
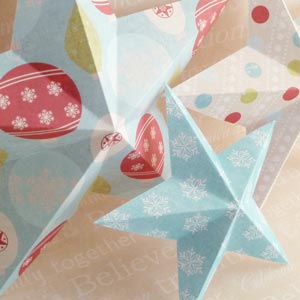
These 5 pointed origami stars are easy to fold and make beautiful Christmas decorations. You can make them from magazines, scrapbook papers or sheet music, whatever you happen to have lying around.
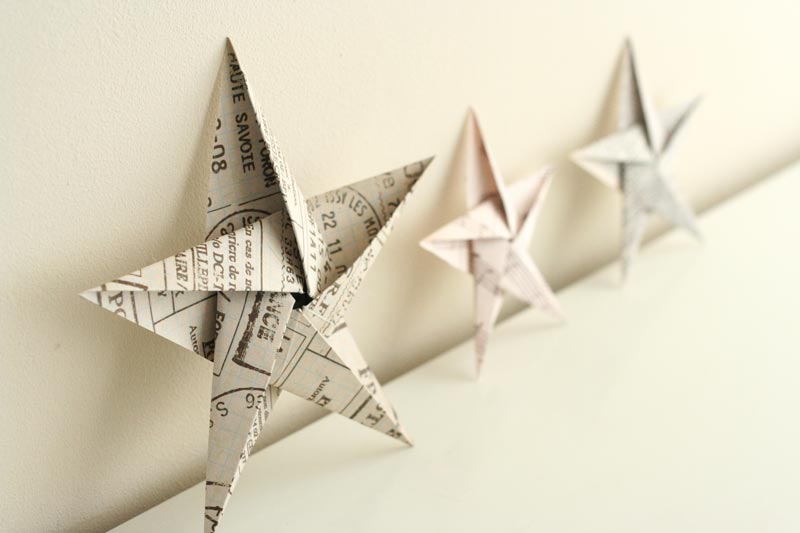
We don't have our tree up just yet so for now I've put these Christmas star decorations on our mantelpiece.


One of the 5 pointed origami stars is folded from scan of a dictionary page and the others are made from vintage style scrapbook papers. I went for vintage patterns but you could equally well use bright Christmas colors.


I also tried hanging them on the mirror in our living room and I think they look quite nice there:
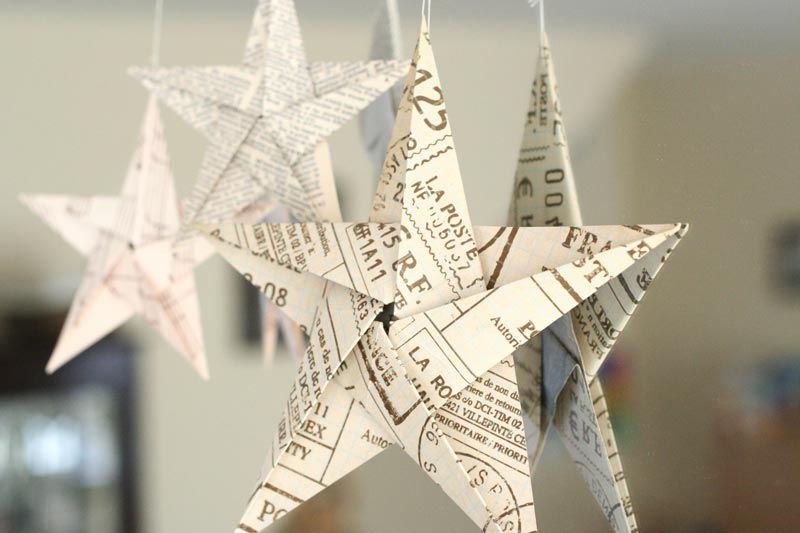

Perhaps we'll move them to our Christmas tree once it's up :-)
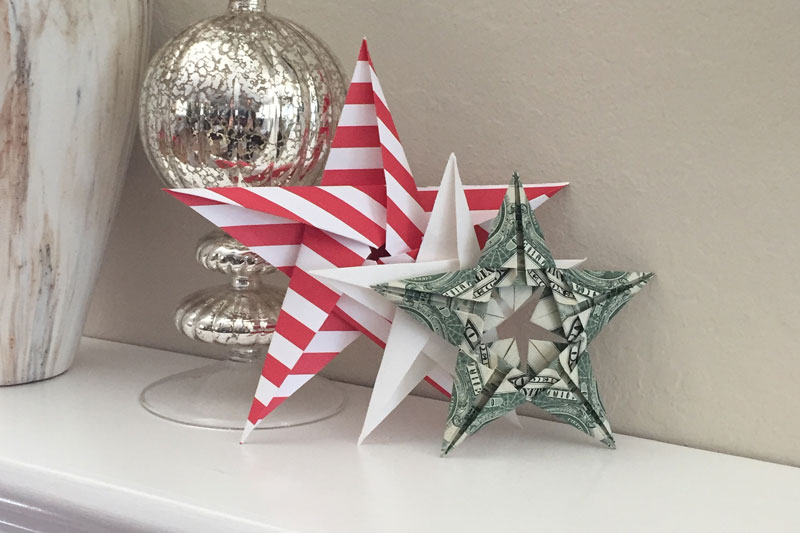
Here's a photo shared by reader Vicki, who made both the origami star from this page and also the modular money origami star. Thanks for sharing your photo Vicki!
Reader Mel Hurst made these gorgeous tiny stars to decorate Christmas cards and presents. Amazing folding Mel, and thanks for sharing your photo!
Materials for 5 Pointed Origami Star
All you need is:
- a square sheet of paper. I like to use 12x12 scrapbooking paper.
- some scissors
Origami purists will frown upon me using scissors but hey, this is the 21st century not feudal Japan ;-)
The finished star Christmas ornaments will be about 60% of the size of the square you start with. So a 12" square will make a 7" star, or a 8.5" square will make a 5" star.
Making the 5 Pointed Origami Star
Video vs Photo Instructions
I think it's way easier to learn how to make these stars by watching videos than by looking at photos, so I'm going to start by showing you the videos.
But if you have a really slow internet connection, or you prefer photos to video, then you can skip down to the step by step photos instead.
First up, you'll need to cut a pentagon out of your square. You can either trace my pentagon template , or you can use an origami trick. I prefer using the origami trick because it works for any size of paper, and also it's quicker. Here's a 2 minute video showing you how it's done:
Video 1: Cut a Pentagon from a Square (origami trick)
Once you've got your pentagon, you're ready to fold the star. Here's our little video showing how:
Video 2: Folding the Star
How did you star turn out? Please leave a comment if you've got a question or just want to say hi.
Making the Pentagon (Photos)
Got your square of paper? Great! Now we need to cut it into a pentagon shape.
You've got two options:

-
Option 1: Download and trace my pentagon template
-
Option 2: Use an origami trick to make a pentagon (instructions below). The advantage of the origami method is that it works for any size sheet of paper, however big or small.
Option 2: Origami Trick to Make Pentagon
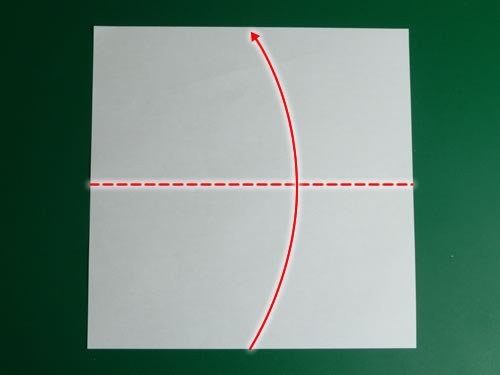
Fold the square in half:
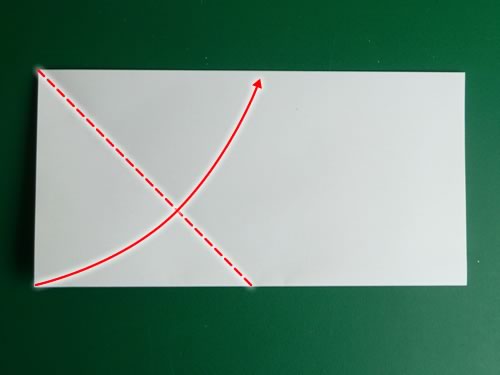
Fold up the bottom left corner to the top, then unfold again.
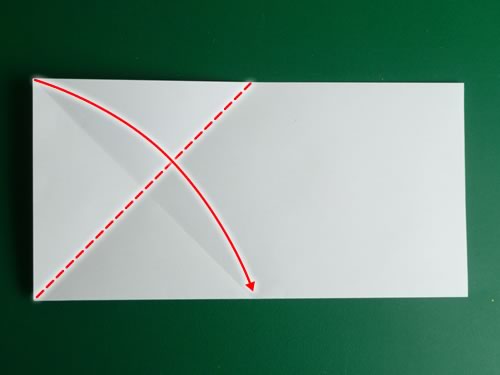
Fold the top left corner to the bottom, then unfold again.
Fold the bottom right corner to the center of the X-shaped crease.

Fold the top layer in half.
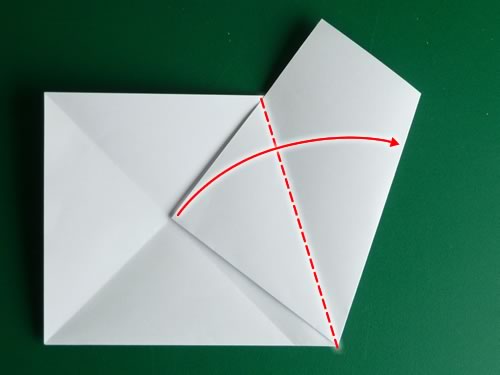
Fold up edge AB to lie along edge AC.
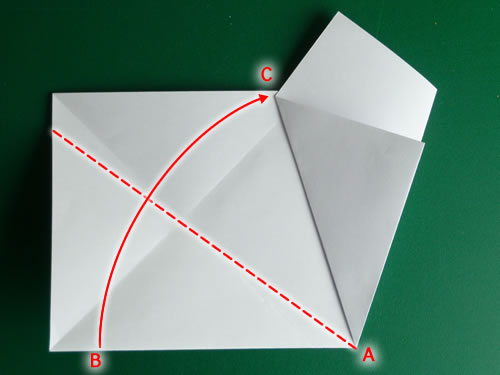
Turn over the paper. Then fold in half along this line.
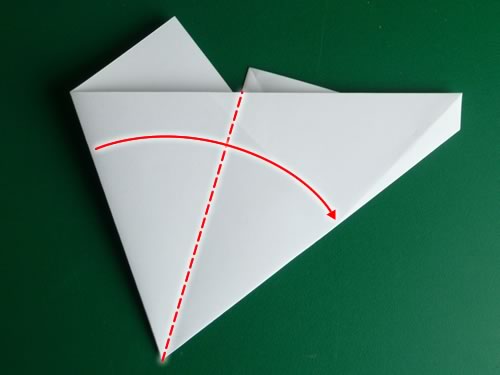
Cut along the edge of the top layer
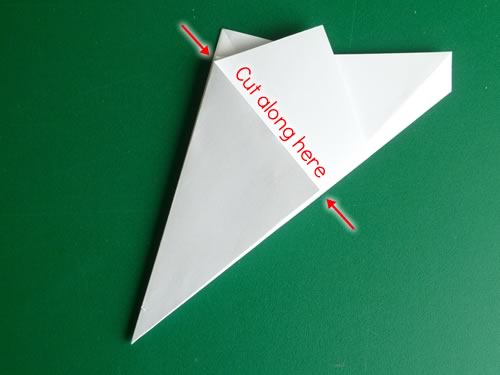
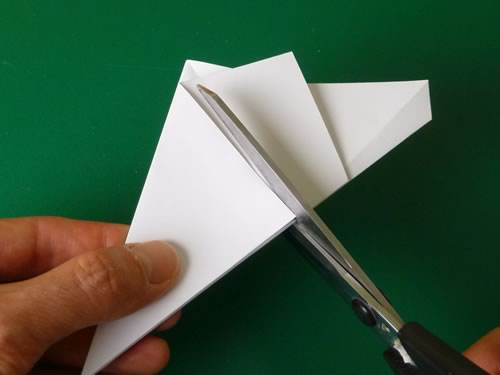
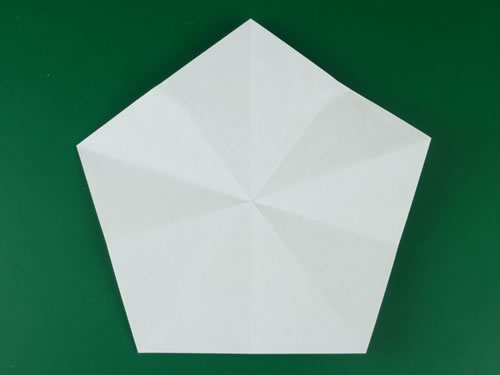
Unfold, and you have a perfect pentagon :-)
Folding the 5 Pointed Origami Star (Photos)
Are you sure you don't want to watch my video instead? I think it's easier to follow than the photos.
Step 1
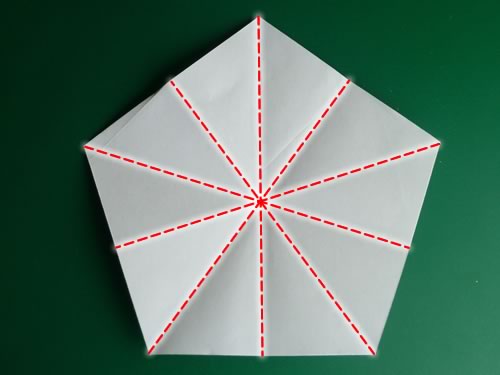
Start with your paper nice-side-down. Fold the pentagon in half through each of its points and unfold again, so that you have a set of creases like this:
Fold up the bottom edge so that the corners meet the creases you just made:
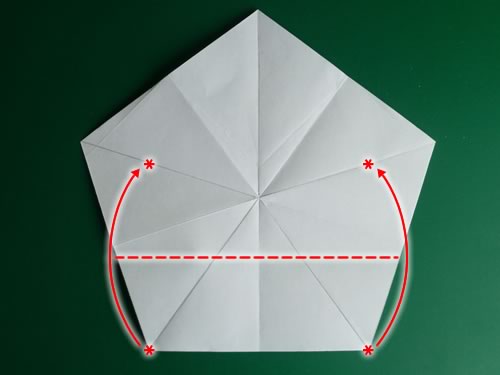
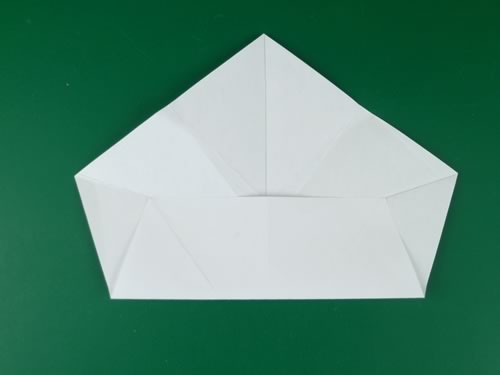
Unfold again, then make the same fold for all the other sides of the pentagon, so that you have a set of creases like this:
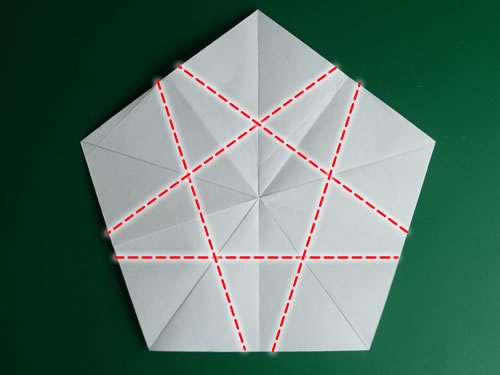
Step 2
Fold in the left edge along one of the creases you just made. Then fold up the bottom edge, at the same time pulling the corner of the pentagon out to the left like this. Squash the fold flat.
Unfold completely. Rotate the pentagon 1/5th of a rotation so that the next side is at the bottom, then repeat the folds as in the image above. Do the same thing for all the rest of the sides of the pentagon. When you've finished you will have a new set of creases that look something like this:
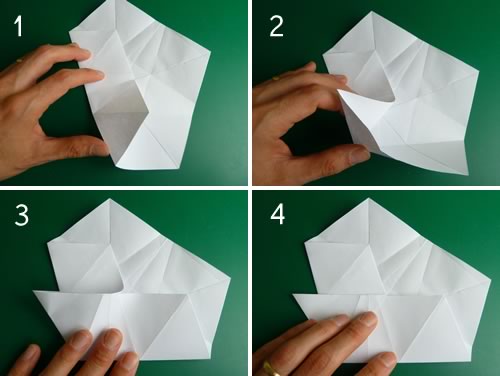
Step 3
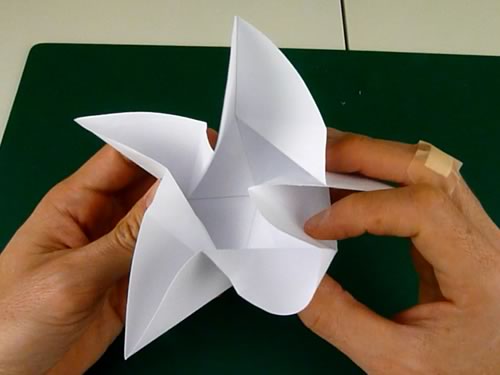
Starting with the pentagon completely unfolded, pinch all the corners together and squash them toward the center. With a bit of "massaging" the paper will collapse into a star shape.
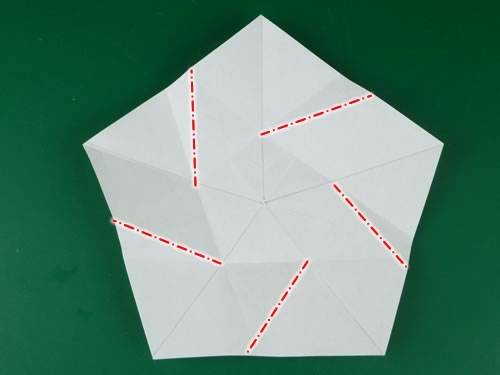
Step 4
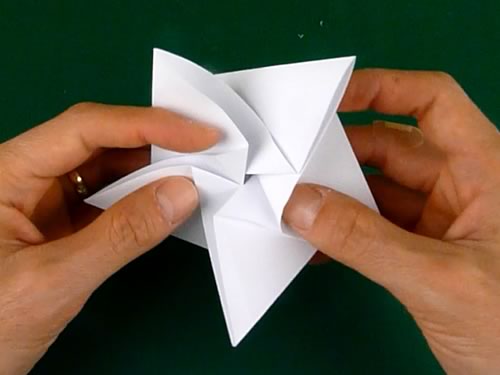
Turn over the star. Fold in the right edge to the center line, like this:
Working clockwise around the star, do the same thing for all the other arms:
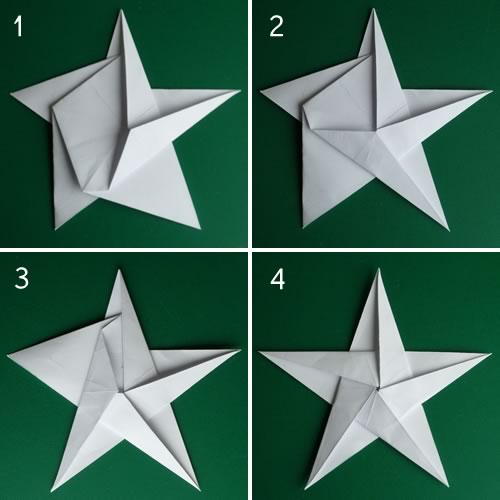
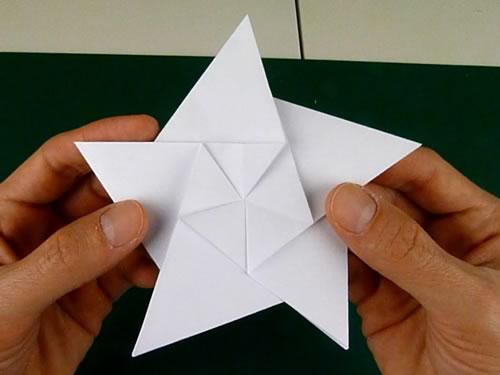
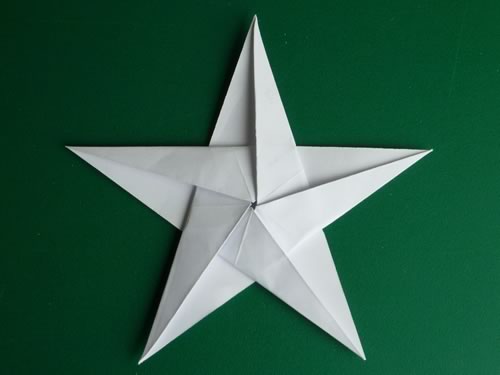
Finished!
Tada! Here's the finished star:
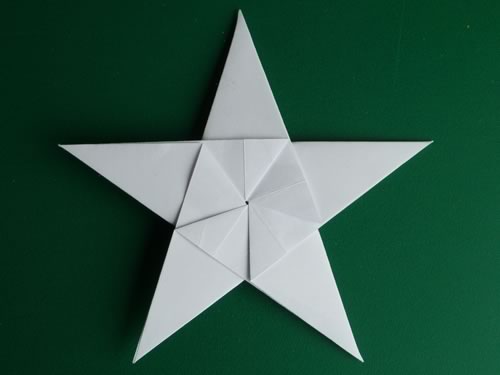
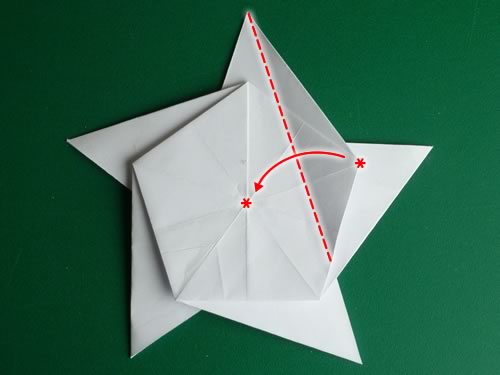
Optional: Tidying up the back
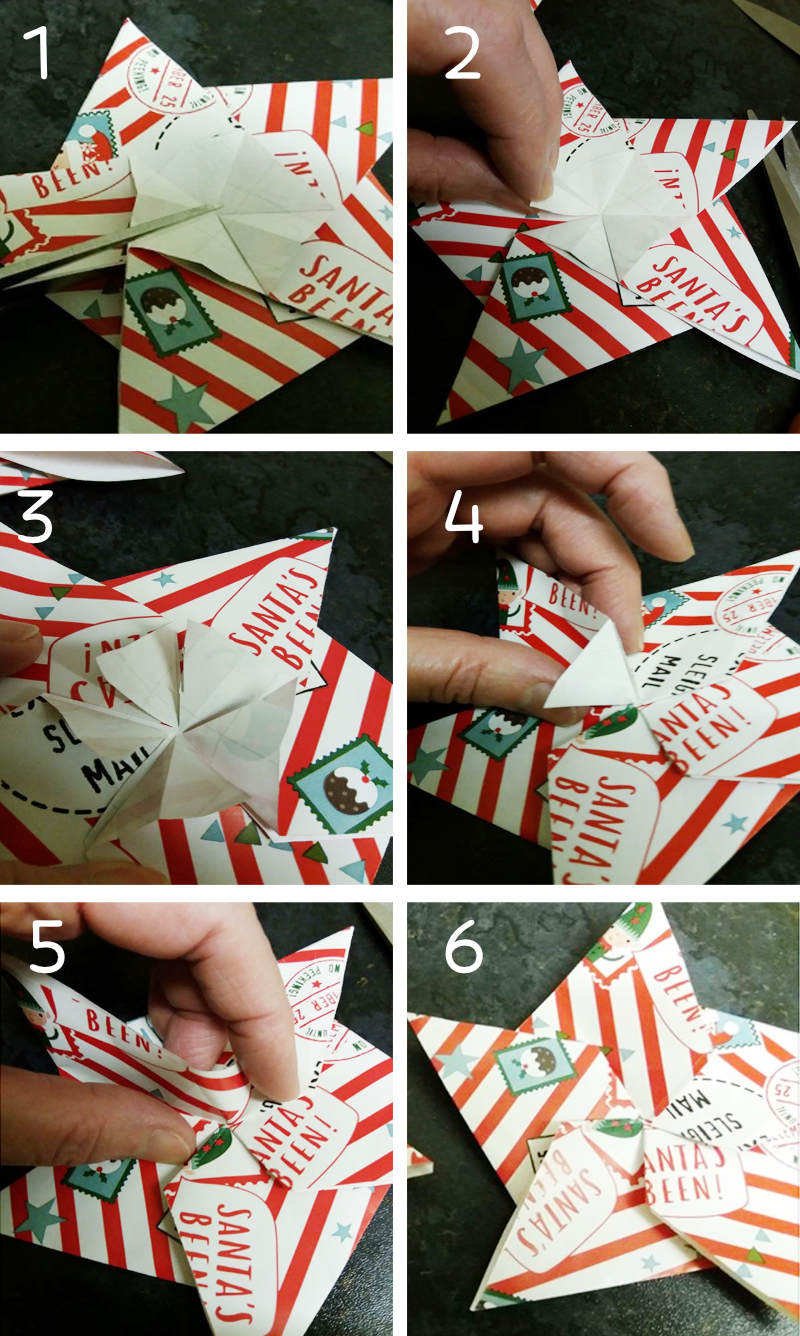
Did you make your star from one-sided colored paper? If you did, you'll notice that there's a white hexagon in the middle on the back. Do you want that hexagon to be colored, like the rest of the star? Here's how, thanks to a clever tip sent in by reader Grace.
"I did a little extra step... use a pair of scissors to snip into the small hexagon and tuck the flaps back under the arms of the star. This series of images shows how"
~Grace
Thanks for the tip and the photos Grace!
Variations
The 5-pointed origami star is nearly the same fold as the traditional origami square envelope, but starting with a pentagon instead of a square. If you compare the end of step 3 on this page with the end of step 4 on the origami envelope page, you'll see that they are the same structure, but with 5-fold versus 4-fold symmetry.
To make a star instead of an envelope, you simply leave the envelope open, and fold each of the arms lengthwise to give the star its slender points.
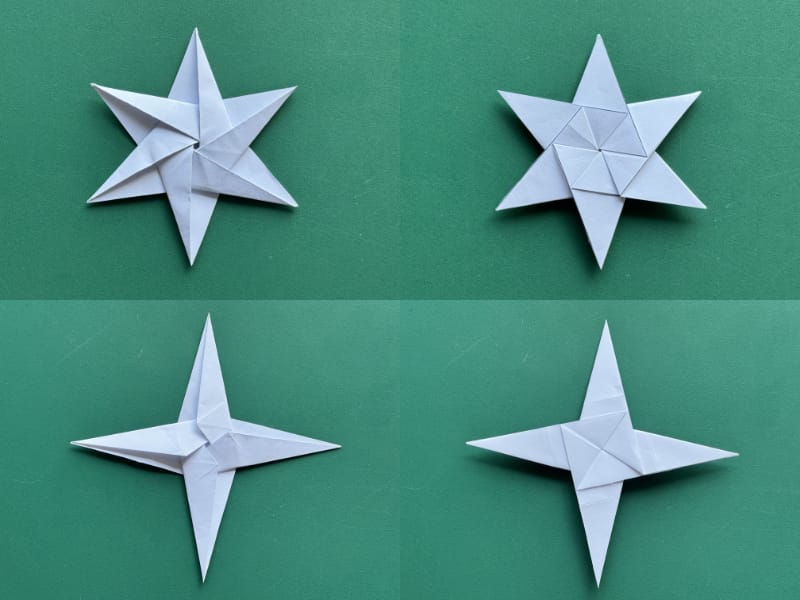
You can also make 4-pointed and 6-pointed stars by starting with a square or hexagon of paper instead of a pentagon, completing steps 1-4 of the traditional origami envelope fold, then folding each of the arms to make slender points - here's a photo of what the stars look like:
I've heard differing accounts about where and by whom instructions for the 5-pointed star were first published. One reader wrote in to say that Shuzo Fujimoto published instructions for the fold in the 1970s, while another reader wrote that instructions were published by Toshi Takahama.
Fun fact: The band Coldplay used this origami star design in their set for their live performances of their song "A Sky Full of Stars"! Here's the video
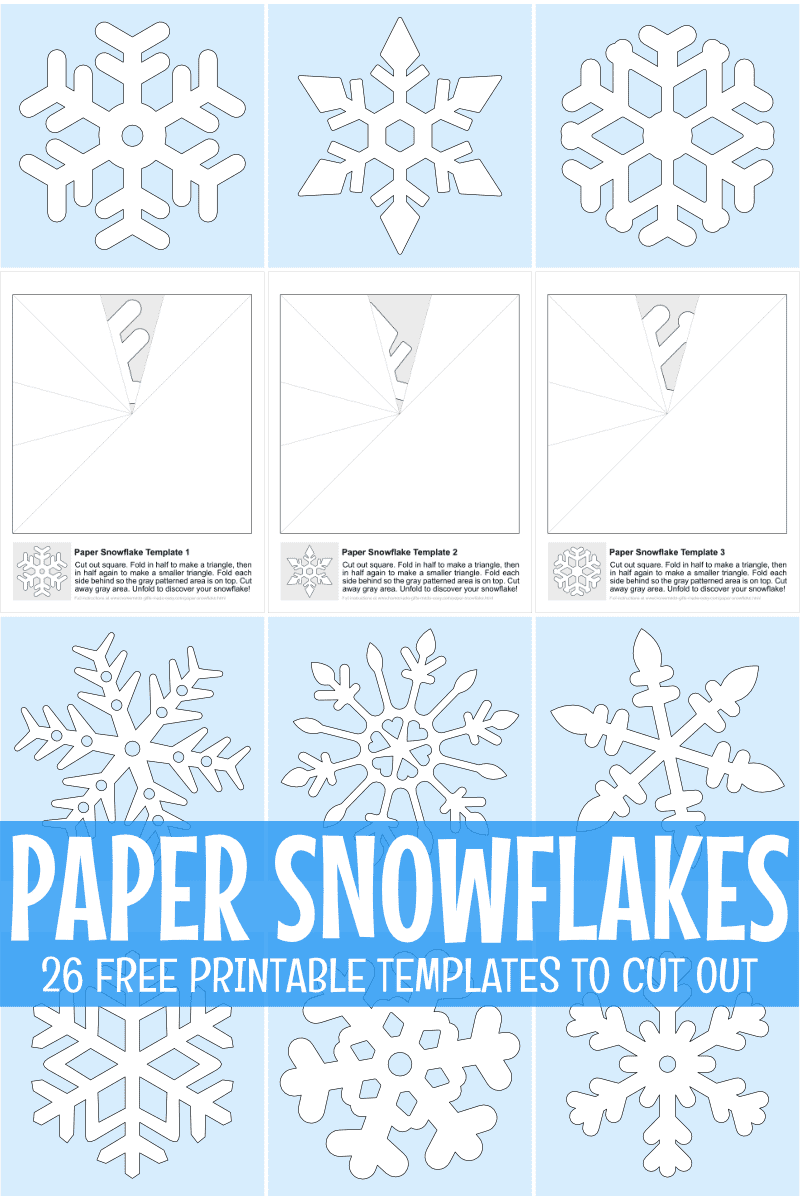
Free Printable Paper Snowflake Templates
Dive into a winter wonderland with our easy step-by-step tutorial on how to make paper snowflakes! Discover a flurry of free printable snowflake patterns, ensuring you can snip and snap your way to the perfect frosty creation in no time! Whether you're decorating for the festive season or just looking for a cozy craft project, our templates offer a touch of snowy magic for everyone. ❄️✂️

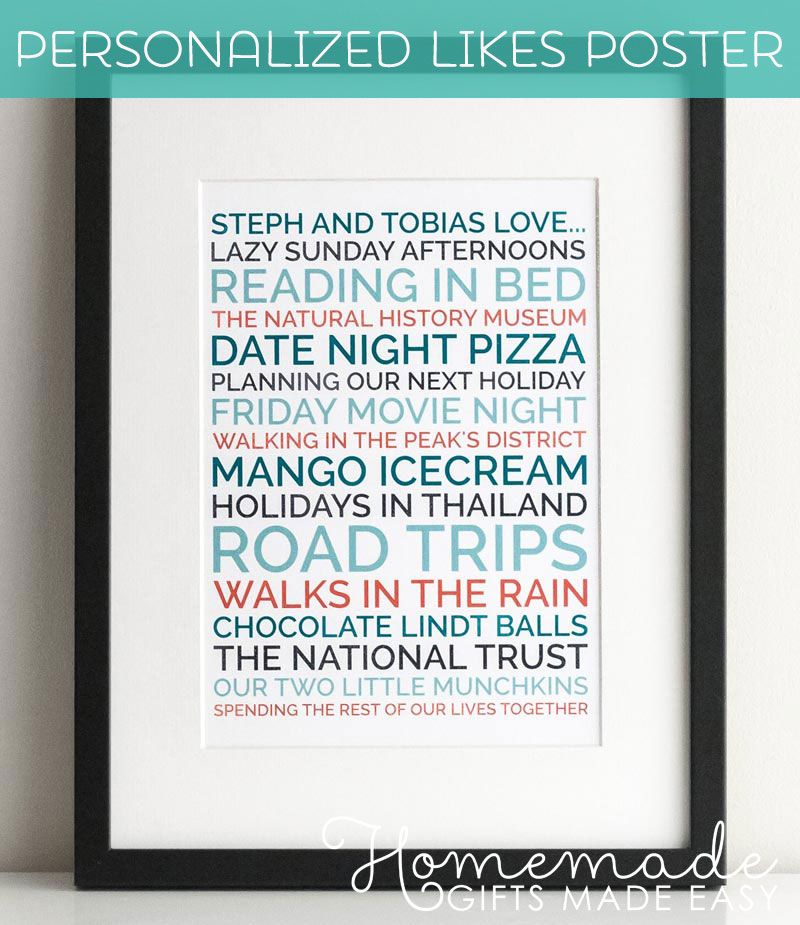
Popular Christmas Gift Ideas
Make a personalized likes poster for your loved ones this Christmas! This couples poster is so easy to print at home and just looks fantastic! Or check out more of our easy to make posters in our printable gifts shop.

If you liked the 5 pointed origami star, you might also like these other Christmas star crafts...

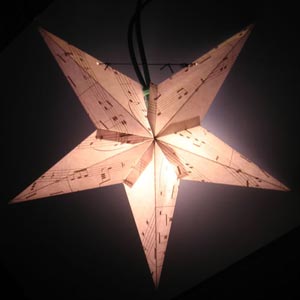
...or check out my full collection of homemade Christmas ornaments .
Happy folding!