Homemade Easter Egg Dye Recipe

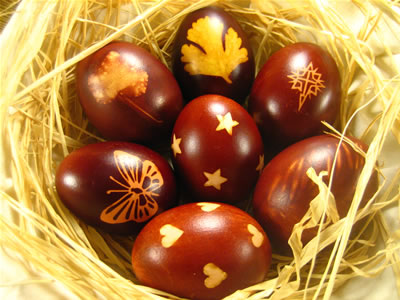
Looking for a homemade Easter egg dye recipe? This one makes a lovely deep red sheen, and all you need to make it is red onions and vinegar. I'll also show you how to make pretty patterns on your eggs.
Dyed eggs make lovely colorful additions to Easter baskets or other Easter gifts. Or just make a batch to use as decorations for the table on Easter Sunday.
Decorate Eggs Before Dying (optional)
You can create gorgeous patterns on your eggs by placing leaves or stickers on them before putting them in the homemade easter egg dye. That way you'll get light patches where the leaves or stickers were.
Making leaf patterns like this is an easy Easter egg decorating idea that's traditional in Greece and some parts of Eastern Europe.
If you just want plain colored eggs, click here to skip ahead to the dye recipe.
If you'd like pretty patterns on your eggs, then gather up your...
Egg Decorating Materials
- A pair of old nylon stockings (new ones work too, but it's polite to ask your mom first before you cut them up :-)
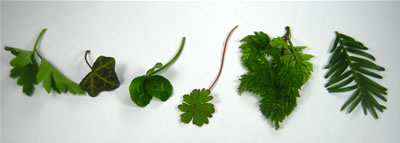
- Leaves , e.g. parsley, clover, ivy, whatever you have in your garden
- Stickers , e.g. hearts, butterflies, stars, whatever you like
Egg Decorating Method
- Wash your eggs in soapy water to remove any grease from their surface, and then dry them.
- Put stickers and leaves onto your eggs. To make the leaves stick to the eggs, wet the leaf with a bit of water before you place it on the egg. We also tried using a glue stick to help to stick the leaves on the eggs, and that seemed to work really well!
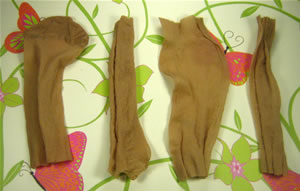
- Cut the legs of the nylon stockings into 4" (10 cm) tubes. You'll need one tube per egg.
- Tie a knot in the end of each tube, then place an egg into each one, and tie another knot to close the tube. This stocking casing helps to hold the leaves and stickers in place during the boiling process. The tighter you pull the stocking around the egg, the better it holds things in place. Just be careful not to dislodge the leaves or stickers as your tying the knot.
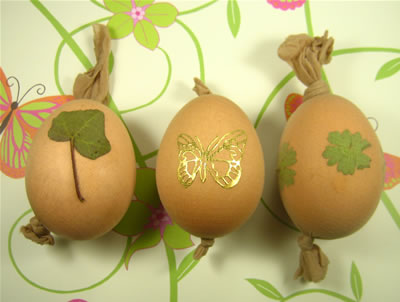
Now your eggs are ready to be dyed!
Homemade Easter Egg Dye Recipe
Dye Ingredients (enough for 6 eggs)
- 2 Tbsp vinegar
- Skins from 6 red onions, or one onion per egg. You only need the flaky outer bit of the skin.
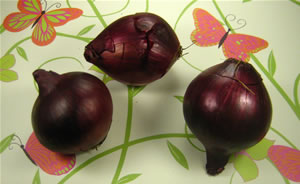
Homemade Easter Egg Dye: Method
- Wash the eggs in soapy water. The cleaner they are, the better the dye will stick. (You will have already done this step if you pre-decorated your eggs.)
-
Put the red onion skins and vinegar in a small saucepan and cover with water. Bring to the boil and simmer for about 30 minutes. Add your eggs (make sure they are completely covered with liquid) and boil for 10-12 minutes. The longer you boil your eggs, the darker in color they will be.
(If you are in a rush, you can put the eggs in with the onion skins the start, and boil them for 30 minutes. This is fine if you want the eggs purely for decoration, but I am not sure how edible they will be if they are boiled for that long!)
- Once your eggs are dyed remove them from the dye-water to cool. Don't throw away the dye-water, as you can re-use it on another batch of eggs. I like to strain out the onion skins and just re-use the liquid part.
- Once your eggs are cool, remove the nylons and any decorations. You can rub a small amount of oil or butter on the surface of your dyed eggs to polish them up, as this will make them nice and shiny.
Depending on the decorations used (that is, edible!) and how long you boiled them for, the boiled eggs are fine to eat. I recommend storing them in the fridge after boiling if you plan to eat them.
Mostly we like to place these eggs around the house as part of our Easter decorations, and we don't usually eat them. Especially not if we have used leaves from the garden to decorate the eggs.
What Next?
I hope you like this natural homemade Easter Egg dye as much as we do!
Other natural dyes you can use include red cabbage (for a blue dye), spinach (for a green hue), black tea (for a light brown dye), and I am sure there are many more! We find this red-onion dye to be a strong, dark dye and the most reliable, but have fun experimenting if you want a range of colors.
Here are some other pages you might also enjoy:
