How to Make Origami Heart Love Notes
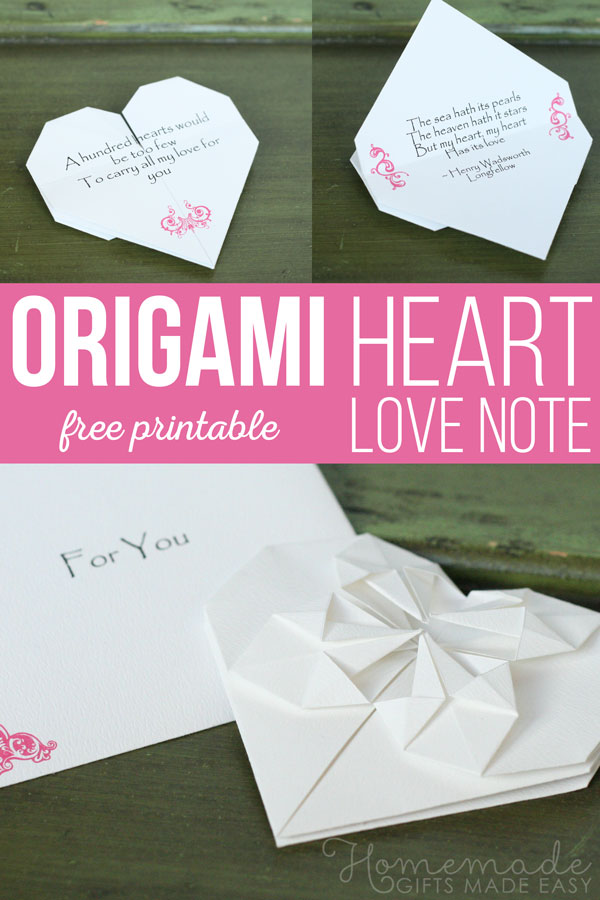
Learn how to make origami heart love notes to woo your sweet-heart! These love notes are so romantic, and you can personalize them for your special one.
We've had money origami heart instructions up on the website for several years now and many people have used them to fold romantic cash gifts for their friends and family. The instructions can also be adapted to fold sweet little notes out of plain or decorative paper.
Amy from Eat Drink Chic used our money origami instructions to make a bunch of gorgeous little love notes for her engagement party invitations, and she made her own printable template for her readers to download.
After several emails asking us for something similar, we've come up with an origami heart love note that you can printa and fold at home.
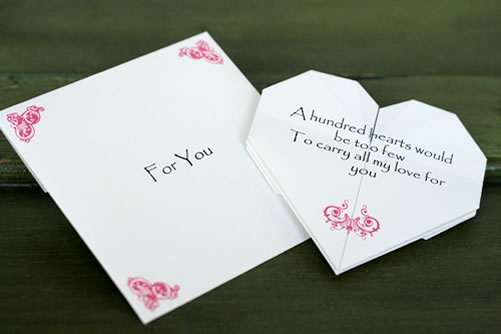
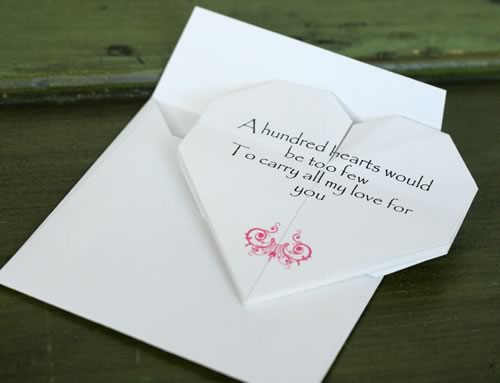
We've also included a printable envelope template that you can print as well, so you can package your little love note perfectly for your sweet-heart!
Do check out our collection of Valentine card sayings and cute boyfriend quotes if you'd like some inspiration for messages to write in a love note.
Materials for Origami Heart
How to make origami hearts: what materials do I need?
To make the origami heart you will need a sheet of paper twice as long as it is wide, e.g. 10 x 5 inches.
Free template
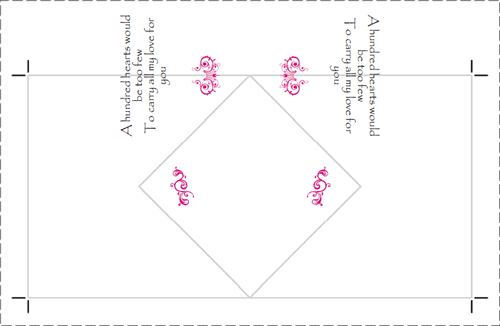
To make things easy for you I've made a template which you can download. Just click the link below. The template is pre-filled with a quote to appear on the outside of the heart and some embellishments.
A hundred hearts would be too few
To carry all my love for you
~Anon
The inside of the heart is left blank for you to write your own message. There's also a free envelope template designed to perfectly fit the heart.
Origami Heart Video Instructions
If the videos are slow to load, you can follow my step by step photos below instead
How to fold the heart
Here's a little video showing how to make origami heart love notes:
Troubleshooting
Here's what to do if the corners don't line up properly in the first fold.
Origami Heart Folding Instructions - Photos
How to make origami heart love notes, step by step...
If you've folded our decorative money origami heart project before then you'll find this is almost the same. There are just some slight changes because we'll be using a different-shaped rectangle.
Step 1
Print the template . Use a craft knife and ruler to cut out the marked rectangle.
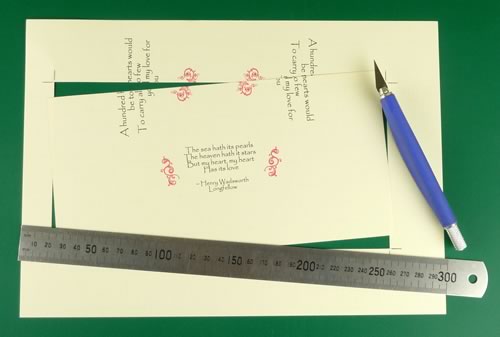
Tip: If you're using our printable template, you won't see any text in the middle of the rectangle. Instead, you'll see a diamond-shaped outline showing where you can write your message. This message will be inside the heart. It's easiest to write your message now before you fold the heart.
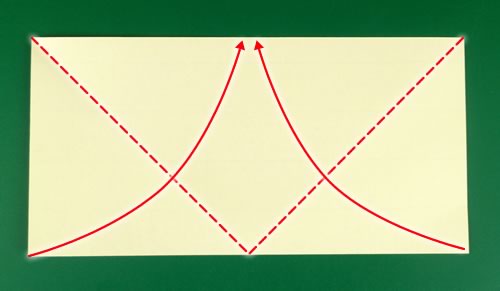
Place the rectangle blank-side-up. Fold up the bottom two corners to the top edge.
Step 2
You will see two parts of text line up like this. (If you don't see any text, rotate your paper 180° and try again.) This is your chance to get the text lined up perfectly, so take your time adjusting the folds until you're happy with how the text lines up .
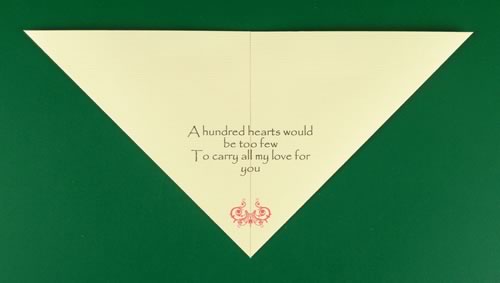
Making this fold accurately is the most important step of how to make origami heart love notes in order for the note to look good when it's finished.
Step 3
Undo the folds from steps 1 and 2. Then fold down the top two corners to meet the bottom edge.
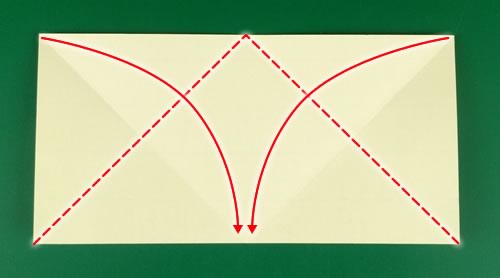
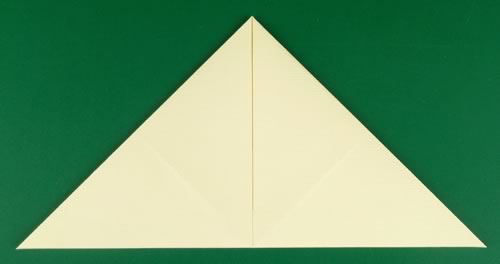
Step 4
Undo the folds from step 3. Turn the paper over so the text side is up. Then fold in each side to the center. You will be able to tell where the exact center is because of the creases left from the previous folds.
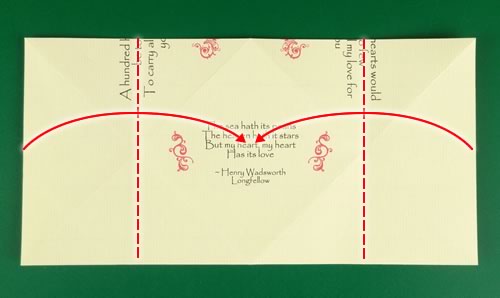
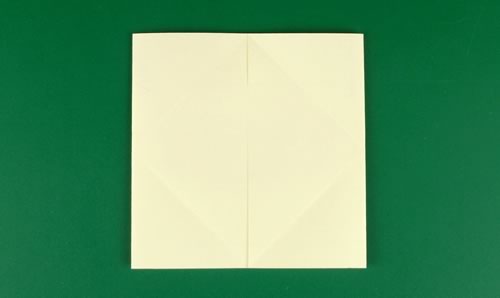
Step 5
Undo the folds from step 4. Place the paper blank-side-up in a "portrait" position. Pull inward on the left and right edges about 1/4 of the way from the top.
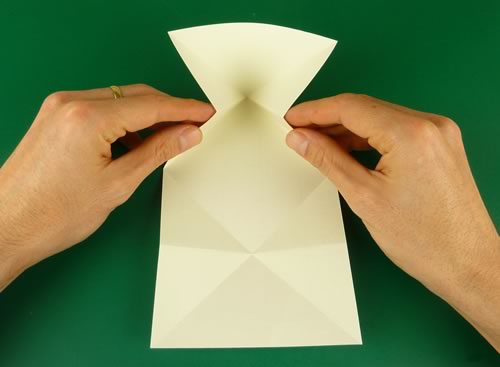
Collapse the top section down into a triangle.
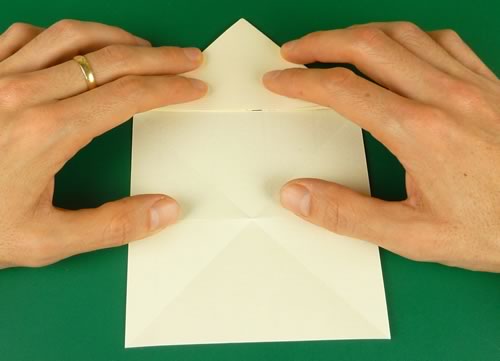
Rotate the paper 180° and repeat on the other side
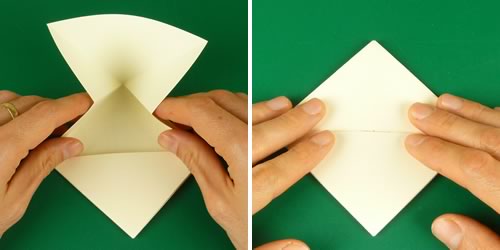
Step 6 - how to make origami hearts
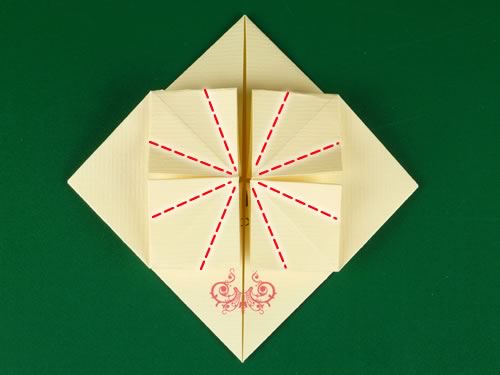
Rotate the paper 90° so that it is in this orientation (see below). Lifting only the loose top layer, fold along the lines marked below.
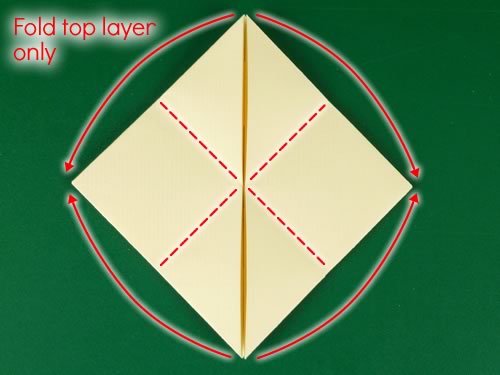
Poke your finger into the top-left triangular flap and open it out.
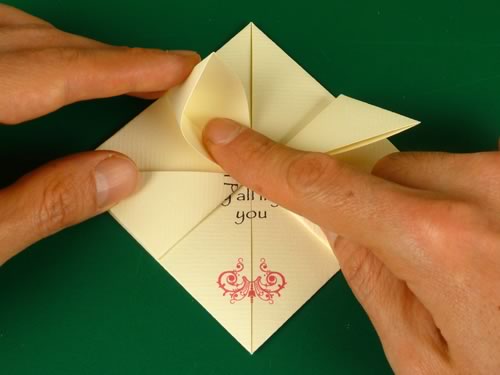
Squash the flap flat into a little square. Repeat for the other three flaps.
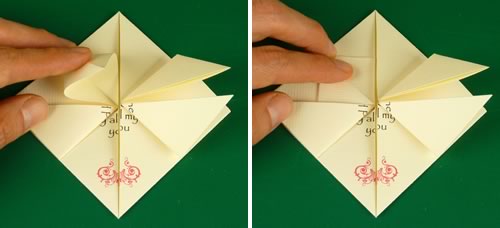
Step 7
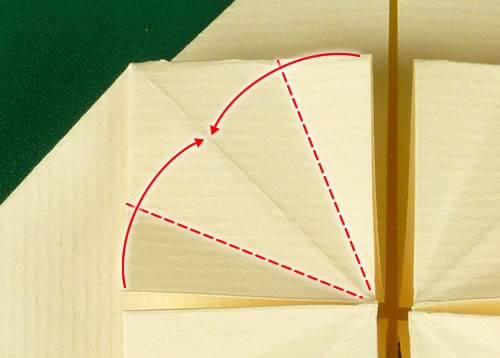
Now you have four little flattened squares. Fold in the sides of each square to the center, so that each square becomes a kite shape.
Here's a close up of the fold:
Step 8 - how to make origami hearts
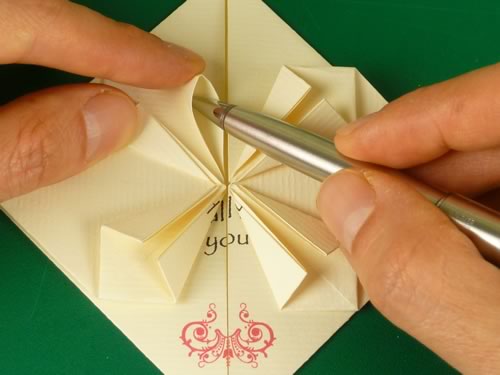
Use the tip of a pen or another pointy item of some sort to open out one of the flaps in the side of one of the little "kites".
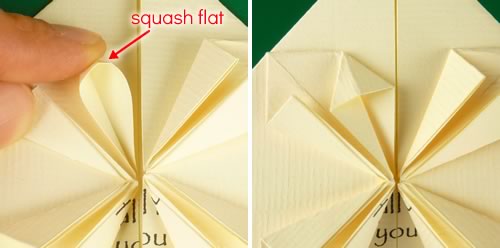
Then squash it flat
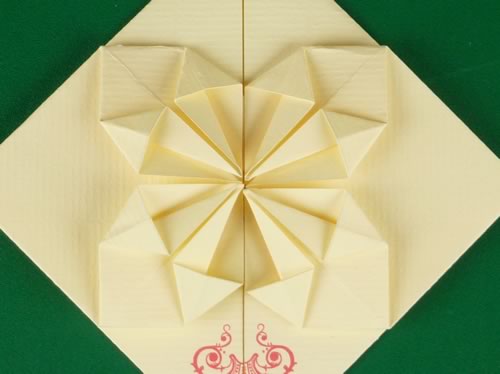
Repeat for all the other little flaps. Your paper will look like this. You're doing well :-)
Step 9
Turn the paper over and fold the top corner down to meet the bottom. You should then see the message on the outside of the heart (right panel below).
If you don't see any text, it's because your heart is upside down, so fold the bottom corner up to meet the top instead.

Step 10 - how to make origami hearts
Turn over the heart so that the starburst pattern is facing up. Fold in the left and right corners to "round off" the heart shape.
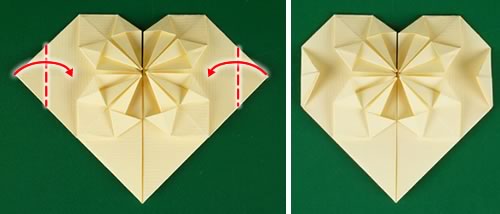
Your heart is finished! The remaining steps are optional.
All that happens in the remaining steps is that we tuck away flaps on the left and the right sides of the heart. That makes it a little easier to open up the heart and see the message inside, but it's strictly optional and your heart is perfectly good as it is.
Step 11
Undo the folds from step 10, turn over the heart, and fold in the left and right edges again on this side, along the same crease lines.

Step 12
Undo the folds from step 11. Grasp the bottom corner and lift it up, lifting only the top layer.
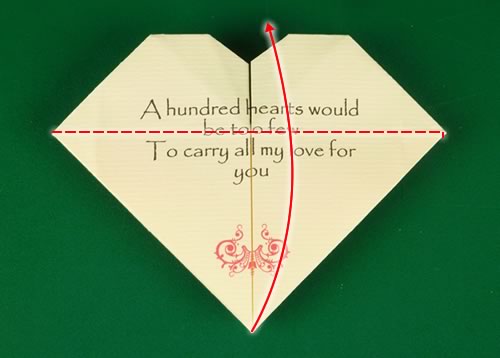
Step 13 - how to make origami hearts
Your heart will look like the left panel below. Turn it over, so it looks like the right panel below.
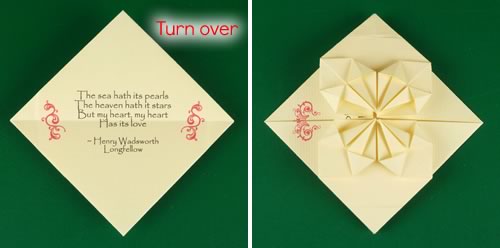
Grasp the top layer of the bottom half, and open it out like this
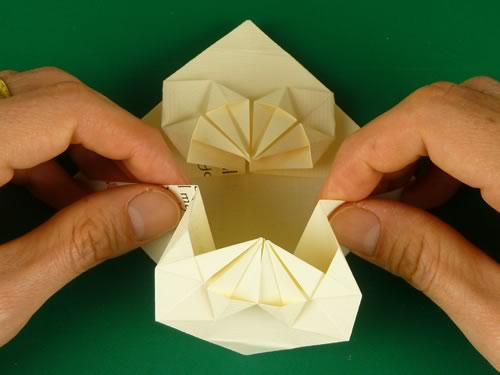
Rotate your hands away from you, so that a pointy bit of the paper is pointing toward you.
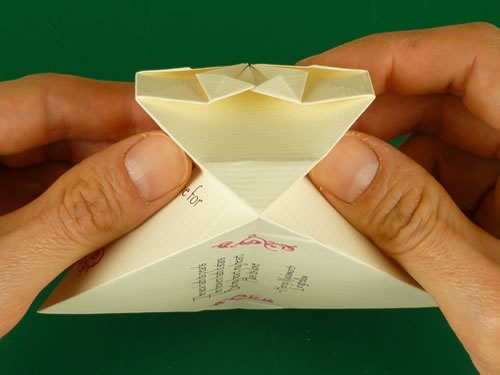
Press in the point, using your thumbs (or whatever fingers you have free :-). You want the point to collapse into a flat square. Then press it in even a bit more so that it becomes a shallow hole. It can be a bit fiddly so take your time.
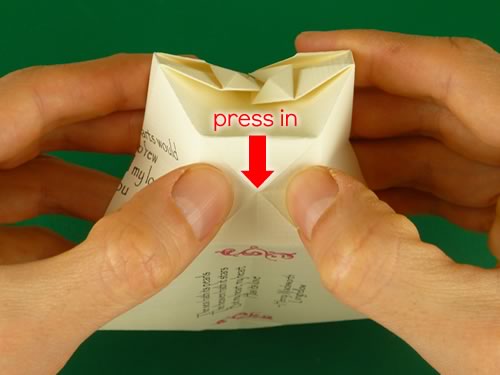
Place a finger on each side of the square, then press in on all the sides.
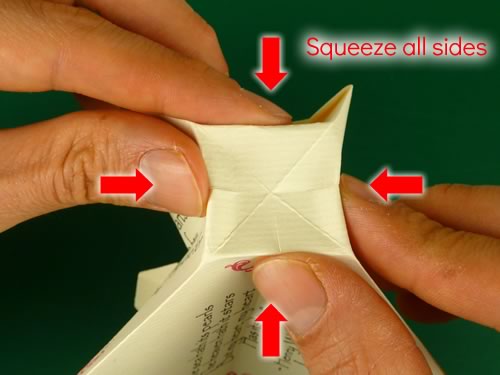
The square will collapse like this. Press on the top and the bottom to squash it.
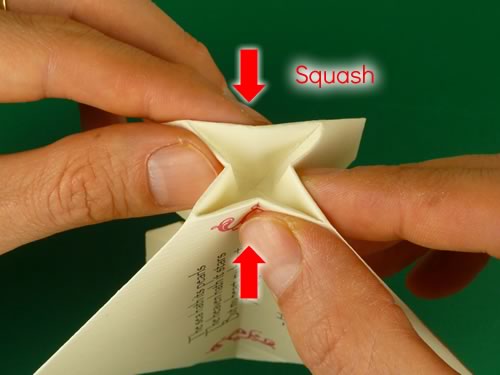
Keep squashing until it's flat.
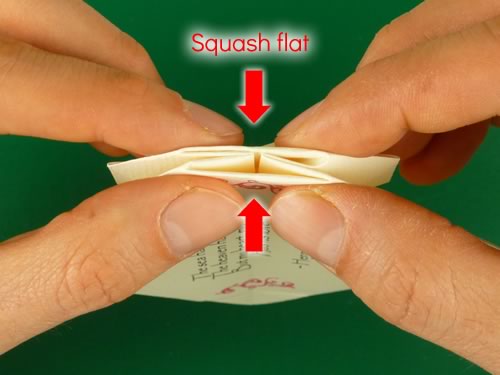
Phew! Well done! You just did an advanced origami fold called a "sink fold". That was probably the trickiest bit of how to make origami hearts.
Step 14
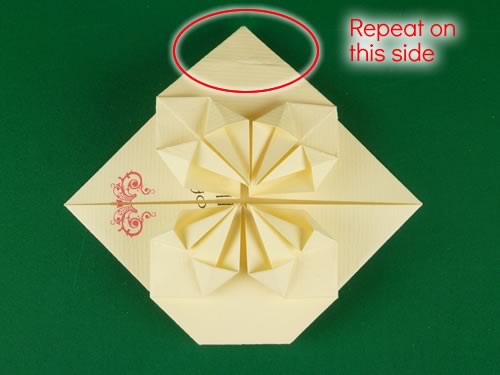
You just did a sink fold on the corner on one side of the heart. Now all that's left to do is the other side. So, repeat step 13 for the other corner.
Step 15
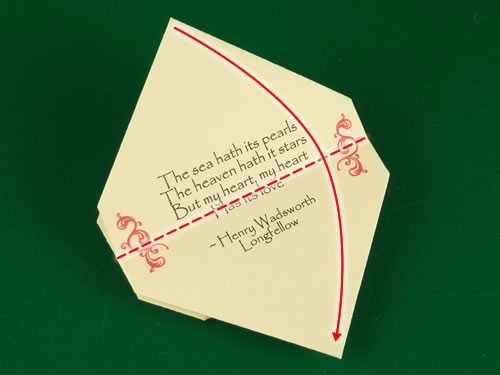
Turn over the paper and fold it in half
Finished!
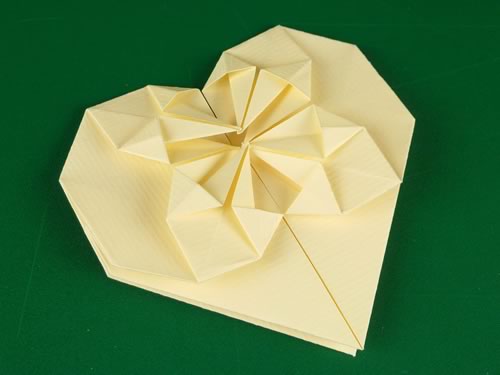
Here's the finished heart!

I hope you enjoyed this tutorial :-) If you have any questions or just want to say hi, please comment on how to make origami hearts .
You might also like...
If you liked learning how to make origami heart love notes, you might also like our heart templates or some of these other projects:
