Make a Jacobs Ladder Toy - Instructions & Photos

The Jacobs Ladder toy is a fun optical illusion and toy. I'll show you how to make one with things from around the house, without any special tools.
In case you've never seen one, here's a wooden Jacobs ladder toy in action:
And here's one I made out of blocks of chocolate (I'm serious!):
So now you have two choices:
Build a Jacobs Ladder Wood Toy
A nice youtube video on how to make one out of blocks of wood and lengths of ribbon (not my video):
Choc Jacobs Ladder Toy Materials
Traditionally, these toys are made from wood and ribbon. But I didn't have any blocks of wood lying around, maybe you don't either. Luckily, there's another material that's perfect - chocolate! Yes, that's right folks, I'm going to show you how to make an edible Jacobs ladder. What could be a better homemade gift for kids than a toy you can eat?
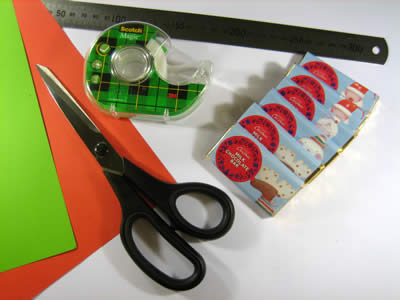
All you need is:
- 6 small blocks of chocolate (I found some Christmas-themed mini-blocks, but I think Kit Kats could work well too)
- 2 sheets of paper of different colors
- Adhesive tape
- Scissors
- Ruler
Make a Jacobs Ladder Toy from Chocolate!
Don't freak out at the number of steps. The only reason there are so many is because I broke it down into tiny, do-able steps. I promise you it's really easy to make!
Step 1
Cut out 9 thin strips of green paper and 6 thin strips of red paper, or whatever two colors you've chosen. Each strip should be as long as two blocks of chocolate laid end-to-end, and about 1/4 as wide as a block of chocolate.
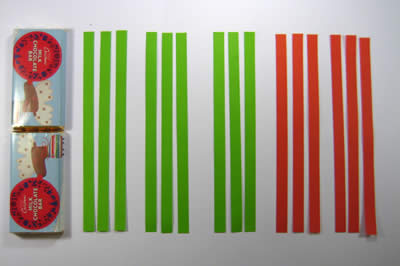
Step 2
Put a block of chocolate on the table with the nice side up. Stick on three green strip of paper using adhesive tape. Two on the left, and one on the right, like in the picture below:
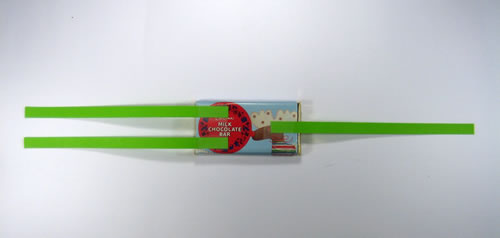
Step 3
Put another block of chocolate on the table, nice side down. Similar to the previous step, stick on three red strips of paper using adhesive tape. Two on the left, and one on the right, like in the picture below:
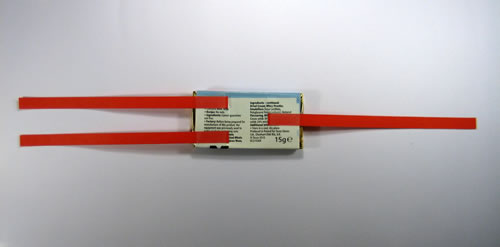
Step 4
Repeat the previous steps until you have 3 blocks of chocolate with green strips of paper, and 2 blocks of chocolate with red strips of paper. You should also have 1 block of chocolate with nothing stuck to it. Here's a picture of what all the blocks of chocolate should look like now:
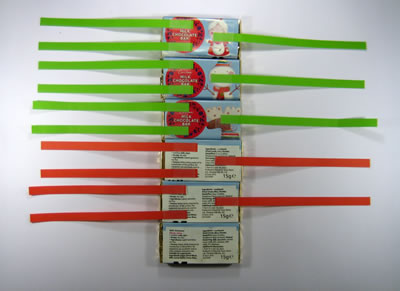
Step 5
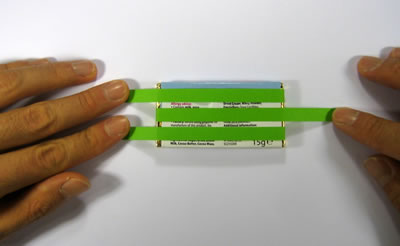
Take one of the blocks with green strips and put it face-down like this:

Step 6
Then fold the strips over the top of the block like this:
Step 7
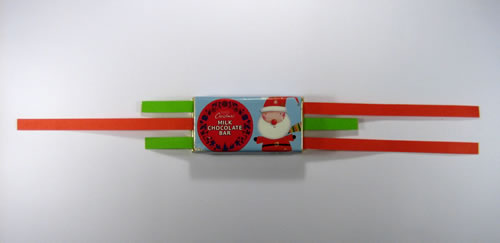
Put one of the blocks with red strips face up on top of the first block:
Step 8
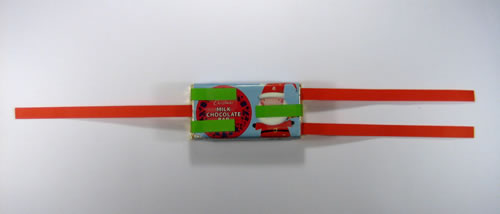
Fold the green ends over and tape them onto the second block:
Step 9
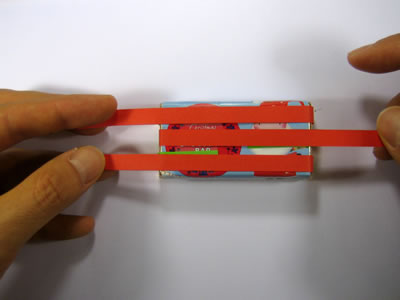
Fold the red strips over the second block like this:
Step 10
Place another block with green strips on top, face down. Basically, whenever you add a new block, you always put it so that the strips of paper are on the underside.
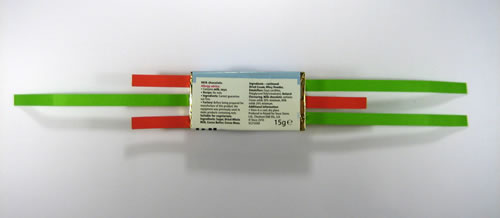
Step 11
Fold the red strips over and tape them onto the top block:
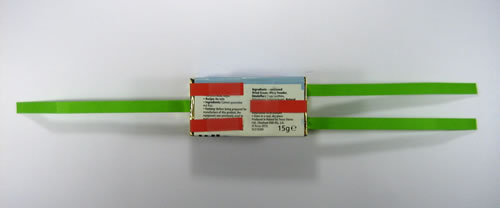
Step 12
Keep adding the rest of the chocolate blocks, alternating between ones with green strips and ones with red strips. The very last block you add will be the one that doesn't have any strips. Place it on the top of the pile:
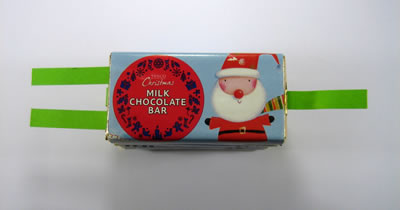
Then fold over the green strips from the block underneath, and tape them on:
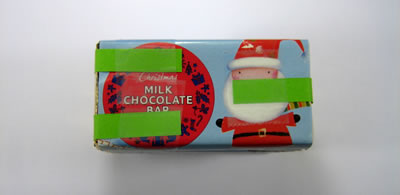
Finished!
This is the finished Jacobs ladder toy:
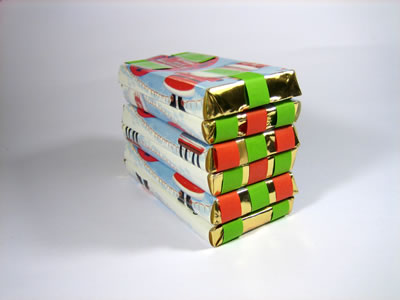
And here it is stretched out:

And here it is in action again:
Well done on finishing it! How did it turn out? I hope you found my Jacobs Ladder toy instructions clear. If you have any comments or suggestions on my instructions, or just want to say hi, then please contact me with this handy form
What next?
Looking for more stuff to make? Check out some of my other projects...
